Wednesday, December 01, 2010

My Process and How My Organization Reflects It

Today is going to be a LONG post.  Sorry.  There was some discussion at the PTI boards about organization.  I wanted to snap some photos to help some of my fellow crafters out.  So, I thought a blog post was in order so that I can explain it all in one place.  So, you may see these on the boards, too.

My Process

Here is a little overview of my little stamping space.  Otherwise known in our house as "Mom's Closet". This little room is off the back of my bathroom, which is off the back of our master bedroom, at the very end/corner of our house, as far away from humanity as humanly possible, out of ear shot of any goings on in my house . . . you get the picture.  This was a very purposeful little space - just for me (well, or any kids who wander in because that's the kind of mom I am).  And seriously, it is small.  But, when you are building a house and each square foot costs you, you realize really quick that an oversized closet will be best.  And, when we sell, someone will get two walk in closets and one extremely large one.  I will be making some woman VERY happy.


I have lots going on here.  I will come back to the specifics later throughout my post.

I almost always (and without fail, every time, seriously) start with the stamps.  I just do.  Nothing is more frustrating than trying to put a stamp or fit it with something I want to use.  It just frustrates me.  So, I have two things I use for this.

The first is my "stamp book".


This is it. No frills.  Here are some peeks inside.


Yes, I actually stamp each stamp in this book.  YIKES!  I find that it helps for a couple of reasons.  One, often times the stamps need conditioning before they can be used.  I almost always buy PTI, but no matter what brand, I go through the same steps.  As soon as I get my stamps, I open them, stamp them into inventory, and store them in CD cases.  I have had to discipline myself to do this.  But, it makes the rest SO much easier.  Two, I like to stamp them because I get an accurate example of its size.  And last, I can see any trouble spots up front and get a feel for the stamp before it ever hits a project.

This little book offers a bit more than meets the eye.  I write down EVERYTHING I can think of about the stamp on the back of the pages.  I like to write the release date (if I know it), the stamp company, what date I purchased it, how much it cost, does it have a matching die or punch (even if I don't own it), does it have coordinating paper, was there a reason or project that made me purchase the stamps, etc.  You don't know how many times I will see a stamp set and go, "I remember the most adorable card that Nicole made with this."   I can turn the page over and see that it was released in April of 2010 and head straight to her blog.  You would be surprised at how you think you will always remember that these were PTI, Verve Stamps, or whatever.  But months or years later (and 100 stamps sets) you cannot for the life of you remember.  I know this seems obnoxious.  I am slightly embarrassed to share this side of me.  OCD?  But, I am a chain remember-er.  One little bit of info triggers so much.

The second stamp organization tool that I use is my iPad.  Well, actually it is an app on my iPad called HanDBase.  I use it to organize all of my sentiments.  Here is a screen shot of some of my stamps with their sentiments (sorry it isn't rotated).


I use this app to sort sentiments by theme.  I can also do a search for any sentiment that has the word "love" in it, etc.  I don't feel like I have to use the sentiments that are included with a certain stamp set.  I get so much more mileage out of them this way.

Now that I have picked my stamps, I will go looking for any matching dies or punches.  And sometimes, I will just go looking to see what I have that I may want to use.  This is where my "Punch and Die" book comes into play.


Again, no frills.  This little book has lots of surprises.  So let's take a look inside.

I use each page to typically only punch one shape.  I made an exception for the little circle because they were the same brand.  I label the punch with the brand and description.  I don't bother with coordinating stamp sets as this is always changing and referenced with the stamp.  Also, I don't bother with electronic die cuts.  This is only for metal dies or punches.

You may wonder why I kept the negative.  Well, check out what I can do with them.


I can actually use my stamp book to visually see exactly what it is going to look like on my die or punch.  The only downside is that I made my book 4 inches by 4 inches.  I want to go back and make a bigger one to accommodate the PTI Mat Stack Dies.  Who knows?  I may make them their own book.  Obviously, this is always a work in progress.

So, I have my stamps and my die cuts or punches chosen . . .

Now, I take the opportunity to select my color scheme.  I have yet another little handy, dandy book for this, too.  :)  My Color Book!

I made this book the same size as an A2 card - 4.25 by 5.5 inches.  I thought I would show you my little inside secret.
Reused "chipboard".  :)

Here is a picture of one of the pages in this book.


Let me point out a few things.  I adhere a piece of card stock to a white piece of paper.  I like the white because it allows me to stamp directly on it to showcase the ink as well.  I stamp all of my matching colors in the upper right hand corner.  And I of course write in the name.  I don't put PTI on any of these as I only use PTI.  If I went with a different company, I would have to decide if I wanted a new book or add to this.  ???  I am sticking with PTI for now.  Also, on the top left corner of the colored card stock, I have stamped with Versamark.  I like to see what my options are.  I keep thinking that some day I am going to go back and stamp tone on tone as well.  I haven't yet, but this may be the catalyst to get me going, who knows.  The only other thing I have considered and haven't done is adding stamping on Vintage Cream.

I also keep a little book of color schemes. :)  Seriously, I need "little book" therapy.
Do you recognize those?  The PTI team did these for the Anniversary (I think).  Anyway, I not only cut out and paste the color scheme idea, I use one of the dots from Polka Dot Basics to stamp it onto the card.  I have little color challenge pictures cut and in here.  When I see a color scheme I want to keep, I put it in my book.  If I am ever stumped, I just pull it out and go from there.  Sometimes I copy the colors exactly and sometimes they inspire me in a similar or whole new direction.  It is sized at 4.25 inches by 2.5 inches.

Here is a quick look at how I store my paper.


I keep them in their packages and in a magazine rack on my shelf.  This sits desk level on my shelving directly to my right.  I don't keep very much pattern paper, but the non-PTI paper is in the drawers to the right.  The PTI pattern paper in on the shelf to the right of the drawers.  I keep them in their little matchbook holder things.

Now here is where I start thinking about my paper - not just the color.  Do I want to use a pattern, stamp a pattern, emboss, or impress.  For this, I am making another little book.  :)  I don't have a photo of it as it is still under construction, but it is copies of the front of the PTI pattern paper holder.  I don't have a magical answer for other patterns.  I just rummage through the drawer of paper.  Nothing scientific.

If I am going to stamp a pattern, I have already picked it out in my stamp picking process or I can go back to my Stamp Book.  Now, if I want to emboss or impress, well . . . I have a book for that.

It is exactly like my punch book - same size and made from the same materials.  I just took each page and either impressed or embossed.  It is easier if you write on the paper first and then emboss.  But I do that on the back of each page.

This is also where I will go through my border punches and dies.  And, yes, I have a little book for that.  Only my son made cards yesterday.  He was so excited that I had some pre-made cuts for him to use.  :)  He honestly didn't know it was a book.  I had them on a binder ring, but I didn't put any chipboard on it. He saw it laying on my desk and went to town.  So, I will be making another.  It was long like a short ruler.  I cut 2 inch by 6 inch papers and punched the hole.  THEN, I punched the border.  That ensured that all the pages lined up on one side.  I am AR like that.  :)  I will say that when I remake this, I will make it 2 inches by 8 inches (if I were a scrapbooker, I would consider 12 inches).

Now is the fun part.   The embellishments!  I keep most of my embellishments organized by color.  The tall tower of drawers is little bits and pieces all sorted by color - regardless of manufacturer or "set".

Look almost all the way to the left.  See those drawers?  That is all sorts of buttons, flowers, jewels, little pieces of ribbon that didn't get used, etc.  I will run through quickly how I sort some of my other things.

This is how I store my ribbon.  These are Cropper Hopper 3 X 3 embellishment drawers.  For me, this is THE perfect way to store ribbon.  I would love to have a couple more, but they are not made anymore.  I keep all of the same color together and it is sorted according to the order in my color book.  So, if you opened the top left drawer, you would find Scarlet Jewel ribbon, Pure Poppy Ribbon, Terra-cotta Tile Ribbon, and so forth from drawer to drawer.  Yes, I have to readjust with each color release, but I never have to guess where a color will be.  Because I do have to readjust every other month or so, I haven't put the colors on the outside of the drawer.

This is my ink colors.  They are situated on the shelves to the right of my desk.  They sit atop a kitchen organizer.  It is really a pantry riser.  I fits my PTI inks perfectly.  So, dreading the new inks for storage purposes.  I have no idea if this will still work.  I have a few of my reinkers out, but they are usually in a white box (more on those in a bit).  I used a hole punch to punch a small piece of card stock to adhere on the outside of the inks.  I also have them arranged by color groups.  It is fast and painless to find what I need.


I have a bunch of these photo boxes on my shelves.  I like that they are all the same size and fit perfectly on my shelves - maximize the space.  I store all kinds of things in these.  You can see some of the labels. You can find the bulk of the "other" stuff in these boxes: PTI felt, Cricut Catridges, Glitter, Embossing, Tools, Markers and Pens, punches that are seasonal or not used as frequent, non PTI ink, reinkers . . . just to name a few.

The bottom drawer is where are where I store my PTI dies.  Yes, they all fit in there quite well.  Have a peek inside.

The top right is where I keep my Fillable Frames series.  The bottom right is all of the small punches like Up Up and Away, Beautiful Blooms, etc.  The bottom left is for Mat Stacks.  The top left is just for my Christmas Tree.  :)  It is one of the only single, larger dies.

So, where do I store all of my "little books"?  Well, they are typically kept in the metal bin directly in front of me at my desk all the time.  Take a peek.

 I like having them right at my finger tips so that they are a tool to my process.  I really do use all of these things - multiple times per card sometimes.  They greatly increase my productivity by allowing me to put my focus on the fun and design and not what "stuff" I have that would work.

I don't scrapbook much anymore.  Ok, I don't paper scrapbook at all.  But, if you do, I have a tip for you.  Do you see the pink paper poking out of the top right side of my basket.  In that baggie, you will find templates of all sorts of common photo sizes (several of each 4 x 6, 5 x 7, 4 x 4, 3.5 x 5).  I used to be able to plan and make my pages even before I printed my pictures.  It made for MUCH faster work.  No more printing a 4 x 6 only to want a 5 x 7 when you began making the page.

I wanted to point out a couple of last things.  I have created a "U" around me.  All of my supplies (with exception of a few seasonal things or weird things I don't use much) are within reach.  Anything I use a lot is at my finger tips.  All of my adhesive is found in the metal basket right at the front of my desk.  My paper trimmer is hanging on the wall with my Score Buddy right next to it (look beside the drawers).  My scissors are hanging at my fingertips.  I even have my iPad right in front of me.  I can use it to access my stamp database, my inspiration files (I have all of them synced to my iPad), and even watch TV while I work.

I love my space.  I really do.  I am ALWAYS looking for ways to improve.  So, I don't necessarily claim any of the ideas here.  I have seen things and copied them, adjusted them to fit my needs, or yeah I actually thought of a thing or two.  So, what you see today may not be here tomorrow, but I have reached a point where I tweak more instead of change.  But, I am always open to the possibility.  :)

Thanks for bearing with me and all my ramblings.  I hope that this will inspire you, give you a push to improve your space, or impress you (ok, just kidding!).  Seriously, this craft (for me) is so much about community.  I sincerely hope that in even a small way this would help you out.  If you have questions, let me know.  I will do my best to answer them.

Edited to correct:  I had originally put my iPad app as HandyBase.  It is actually HanDBase.  I know it caused some confusion for those of you looking for it.  I am so sorry I missed the spelling.

Saturday, November 27, 2010

Wishing You

I am sharing the cards from the gift set I shared yesterday.  I made these for my sister.  She has such a distinct style and taste.  I would describe her as charming, nodding toward old world, slightly rustic, yet very sophisticated.  I honestly thought these cards were "her".

For my card, I used some luscious pinefeather felt.  I finally broke down and ordered Papertrey Ink's Pinefeather.  Oh my!!  It is such a great color - ribbons, paper, and felt.  I don't have a need for many Christmas stamps and haven't been able to justify a purchase of a snowflake set.  I have wanted a set for so long, but would only use them sparingly.  So, I thought and thought.  I used the Giga Guidelines 2 to mimic a snowflake.  It worked!  Did you even notice?  I love it when I make these little bitty discoveries.


Thanks for stopping by.  It has been a crazy busy weekend, but I have had a great holiday.  Maybe I can run over to my sisters and see if I can snap a quick picture of the tags that were also a part of this gift set. If you are interested, One Week With . . . starts Monday.  Otherwise, it will be blogging as usual here on my blog.

- All Papertrey Ink unless noted -
Stamps: Tree Trimming Trio, Giga Guidelines II
Ink: Fresh Snow, New Leaf
Paper: Kraft
Other: Pinefeather Felt, Vintage Cream/Fresh Snow Buttons, Rustic Twine, Tree Trimming Trio Die

Friday, November 26, 2010

Better Late Than . . .

Well, never.  I am so super late at posting this.  I really, really, really, really, really, super bad wanted to participate in the Papertrey Ink Bloghop.  Thanksgiving did not lend itself to blogging ease.  :)  Well, here she is - my PTI November blog hop tag project.

I made this little set for my sister (a.k.a. Thanksgiving Host).  I made a small set of Christmas cards with matching tags.  Then, I finished off the entire gift with a tag that I am sharing today.  I hope you enjoy my small, but late contribution.  I will be blogging about the cards and the tags, hopefully, tomorrow.  :)

-All Papertrey Ink unless noted-
Stamps: Home Made
Ink: New Leaf, Tea Dye Due, Versamark
Paper: Kraft
Other: Pinefeather Bitty Dot Ribbon, Pinefeather Grosgrain Ribbon, Tag Sale 2 Die

Wednesday, November 17, 2010

Birthday Wishes

I had the opportunity to spend some time "playing" in my little craft space.  I love those times where you don't limit your creativity.  No challenges, no colors, no particular theme.  Oddly, those can be the most challenging, too.  :)  But, on this day, I was able to just play.

On today's card, I inked up an embossing folder before I ran the paper through my Cuttlebug.  It was definitely an interesting effect.  I will return to this but in different colors and armed with a wealth of knowledge.  Also, do you see the little beaded wire?  That was another "try" I did.  I liked how it turned out overall, but the whole card sorda turned out industrial.

-All Papertrey Ink unless noted-
Stamps: Birthday Wishes (SillyLeAnn Designs 1.0), Life
Paper: Smokey Shadow, Stampers Select White
Ink: Summer Sunrise, Smokey Shadow, Terracotta Tile
Ribbon: Summer Sunrise Grosgrain
Other: Cuttlebug Embossing Folder, Mat Stack 1 Die, Wire and Beads (my little creation)

Monday, November 15, 2010

With Sympathy

Today I am sharing an elegant sympathy card.  It was quick and easy which makes it perfect for an unexpected need.  Thanks for looking and reading today.


-All Papertrey Ink unless noted-
Stamps: With Sympathy, Fancy Flourishes
Paper: Kraft, Melon Berry, Vintage Cream
Ink: Melon Berry
Other: Berry Sorbet and Vintage Cream Buttons, Woodgrain Impression Plate, Flowers (The Paper Studio), Rustic Twine

Wednesday, November 10, 2010

Just Moved

Ok, I totally did not or have not moved.  Well, I moved 4 years ago.  I just made this for a friend.  I wanted to share as it is made with tons of stuff from my Cricut.  I hope you are having a great week.  We went to see "Shrek the Musical" last night and had a ball.  Otherwise, we are gearing up for the holiday weekend here in the States.


-All Papertrey Ink unless noted-
Paper: Aqua Mist, Smokey Shadow, Lemon Tart, Summer Sunrise
Ink: Fresh Snow
Stamps: Up, Up, and Away
Die Cuts: Platin School, Gypsy Font, DoodleType (Cricut by Provocraft)

Monday, November 08, 2010

Happy Fall

Autumn is officially in full bloom in my area of the world.  I love this time of year - the colors, the weather, the thankful spirit in the air.  I made a fun little card to share my love with all my blog readers.  Have a great Autumn season!


-All Papertrey Ink unless noted-
Stamps:  Falling Leaves, Background Basics: Petal Power, Up Up and Away
Paper: Stampers Select White, Terracotta Tile
Ink: Summer Sunrise, Dark Chocolate, Terracotta Tile, Orange Zest, Tea Dye Duo
Other: Prima Flowers, Summer Sunrise Ribbon, Rustic Twine

Monday, November 01, 2010

With Gratitude

I really fell in love with a card I made for the Verve World Card Making Day Challenge here.  I kept looking at it thinking I should do it in a different color.  So, I did.  Enjoy!


-All Papertrey Ink unless noted-
Stamps: Because of You, Wishful Elegance (Verve); A Little Argyle
Paper:  Vintage Cream, Smokey Shadow, Aqua Mist, Spring Moss
Ink: Spring Moss, Smokey Shadow, Aqua Mist, Plum Pudding
Other: Lavender Satin Ribbon (Hobby Lobby), Mat Stack 1, Argyle Embossing Folder (Quickuts), Swiss Dots Embossing Folder (Cuddlebug)


Thanks for looking!  One more thing . . . I am starting a new "series" if you will.  It is called "One Week With".  If you have a moment, go check it out here.

Saturday, October 30, 2010

Thinking of You

Long time no post!  Eeek.  Sometimes life has a way of getting in the way of the things I want to do.  I have missed blogging.  I have missed creating.  I have made a few things behind the scenes.  But quite honestly, I haven't had a chance to get in my little space and create.  You know the kind?  The opportunity to just play with all my creative goodness.  No deadlines.  No projects.  No kids.  No stress.

Oh, I never mentioned my in-laws 40th SURPRISE Anniversary Party.  That is what kept me busy through the end of September and the first half of October.  300 pictures.  220 photos used in a video.  About 100 photos printed, matted, and tagged.  Yes, LOTS of work for me.  So, hopefully I am somewhat back again.


I used a sketch from TE.  This was a few weeks back.  I came up with this idea and never had a chance to see it to completion.  Although the challenge is long gone, I still loved the concept and wanted to keep going.  The polka dots and plaid took FOREVER to stamp (mostly because I made 10 of these).
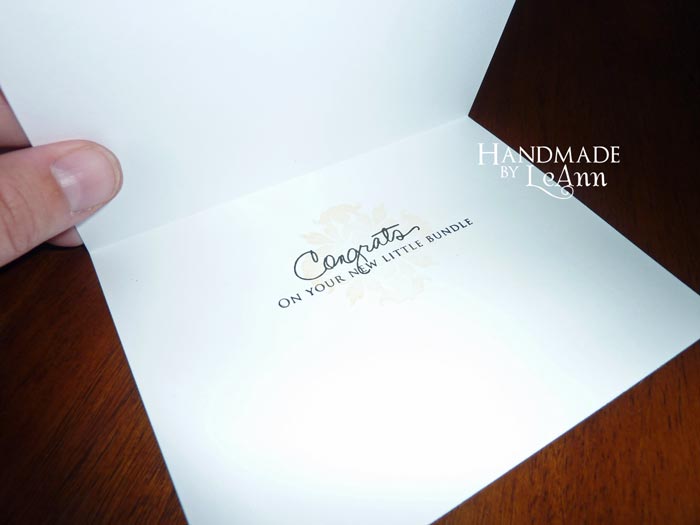
-All Papertrey Ink unless noted-
Stamps: Discover Your Wings (Taylored Expressions); Thinking of You (Stampendous); Polka Dot Basics, Distressed Stripes, Life
Paper: Enchanted Evening, Stampers Select
Ink: Simply Chartreuse, Enchanted Evening, Smokey Shadow, Hawaiian Shores; Noir (Pallette)
Other: Copics

Friday, October 22, 2010

Taylored Expressions October 2010 Bloghop

I am blogging from afar this morning; I hope it all goes as planned.  This month we were instucted to use a stamp from one of the TE Christmas stamp sets.  I chose a beautiful sentiment from the Christmas Blessings set that I picked up at CHA.  This may be my favorite Christmas sentiment of all the Christmas sets I have seen.  Isn't it gorgeous??!!??!!  I was so excited about the color combo.  I think I am going to redo Christmas at our house this year and go with these colors.  Thanks for stopping by.  Be sure to scroll down and visit all the other awesome blogs.


Edited:  I updated my photo from the backseat photo shoot with my iPhone.  Now this is more like it.  :)

-All Papertrey Ink unless noted-
Stamps:  Christmas Blessings (Taylored Expressions); Damask Designs
Paper: Vintage Cream, Kraft
Ink: Pure Poppy, Smokey Shadow, Tea Dye Duo
Ribbon: Red Satin (Hobby Lobby)

Thursday, October 07, 2010

Hello Sunshine

I had so much fun putting this happy little card together.  I will have to admit that I am not a "scrap" user when it comes to making cards.  I had a VERY difficult time trying to use the small pieces of paper sticking out behind the design - so I ditched them.  :)  This is the last card in the Verve Stamps World Card Making Day Sketch Challenge.  Yeah!!!  It was lots of fun!


-All Papertrey Ink unless noted-
Stamps: Let It Shine (Verve); Beautiful Blooms II, School Time
Paper: Stamper's Select White, Spring Rain
Ink: Spring Rain, Lemon Tart, Pure Poppy
Other: White Floss (DMC); Lemon Tart Ribbon and Button

Wednesday, October 06, 2010

I used a Doily!!!

I personally think I am so far from Shabby Chic it is almost unreal.  But, I got some doily transparencies from my Taylored Expressions Key Ingredients kit.  I came very close to just throwing them in the trash.  When I saw this sketch I immediately thought of those doilies.  Well, here is my attempt at vintage, shabby chic . . .


-All Papertrey Ink unless noted-
Stamps: Plain Jane Proverbs 3:5 , Because of You (Verve)
Paper: Plumberry, Choice Buttercream (Taylored Expressions), Restoration Designer Paper (Crate Paper)
Ink: Ocean tides, Plum Pudding, Simply Chartreuse
Other: Doily Transparency, Ribbon (Taylored Expressions Key Ingredients - Sept 2010); Diamond Stickles

Tuesday, October 05, 2010

Birthday Wishes

Thanks for looking!  Here is my contribution to the Verve Stamps World Card Making Day Sketch Challenge #3.


-All Papertrey Ink unless noted-
Stamps: Up Up and Away, Round & Round
Paper: Vintage Cream, Fine Linen, Aqua Mist
Ink: Vintage Cream, Aqua Mist, Tea Dye Duo
Other: Fine Linen Ribbon

Monday, October 04, 2010

Happy Birthday to You

I am working through the Verve Stamps World Card Making Day Sketch Challenges.  Here is the sketch and my card.


-All Papertrey Ink Unless Noted-
Stamps:  Damask Designs, Fillable Frames #5
Paper: Plum Pudding, Dotty Discotti, Kraft
Ink: VersaMark, Plum Pudding, Dark Chocolate
Other:  Plum Pudding Ribbon, Fillable Frames #5 Die

Sunday, October 03, 2010

World Card Making Day with Verve

I had a migraine over the weekend and am just now getting all my Verve Stamps World Card Making Day cards up.  Yikes!!  So, bear with me as I post 5 things in a row.  :)


The first card is from the first sketch.  Simple, right?  :)  I did have a lot of fun with these and really tried to stay true to myself and my design esthetic while pushing myself to use the sketch.  Did that just totally sound like Project Runway or what?


-All Papertrey Ink unless noted-
Stamps: Because of You, Wishful Elegance (Verve) A Little Argyle
Paper:  Vintage Cream, Smokey Shadow, Simply Chartreuse, Orange Zest
Ink: Pure Poppy, Smokey Shadow, Simply Chartreuse, Orange Zest
Other: Red Satin Ribbon (Hobby Lobby), Mat Stack 1, Argyle Embossing Folder (Quickuts), Swiss Dots Embossing Folder (Cuddlebug)

Thanks for looking!

Thursday, September 30, 2010

Papertrey Chicks - Sketch Challenge

The latest Papertrey Chicks Sketch Challenge is up!  I was excited to play along and went for a new color combo for me.  I hope you enjoy!


-All Papertrey Ink unless noted-
Stamps: Background Basics: Diamonds, Round and Round, Background Basics: Petal Power
Paper: Fine Linen, Harvest Gold, Summer Sunrise
Ink: Dark Chocolate, Summer Sunrise
Other: Mat Stack 1

Tuesday, September 28, 2010

Hello

I had made this for a one word challenge and just found the picture today.  Oops!  So, all my blog readers get to see my fun card.


Stamps: Boxes, Bags, and Tags, Fillable Frames #1 (Papertrey Ink)
Paper: Lavender Moon, Stampers Select (Papertrey Ink)
Ribbon: Ribbon FX
Flowers: Prima
Jewels: Dollar Store

Thanks for looking today!  Have a great rest of the week.  I have been in my craft closet most of the day.  Hopefully, I will get back to my regular blog schedule soon.  :)

Saturday, September 25, 2010

PTI Blog Hop September 2010

Hello!  I had a great time making the card for this blog hop.  I cannot wait to see all the great ideas and how as a collection we all make this craft GREAT!  Happy hopping!


I used two different things for this card.

One, I loved how the embossed polka dot background looks.  I saw it here - Soapbox Creations.  Laurie is super talented, and I love visiting her blog almost daily.  So, I am working on my embossing skills, but I had to give it a try anyway.

Two, most of you probably recognize the frame from the ever-so-talented Maile Belles.  The first time I saw her use this frame - found here - I was overwhelmed.  So creative!  So beautiful!!  I knew right then and there that I was going to use this same frame over and over.

I hope I did justice to these talented ladies and their inspiration, ideas, and techniques.  Thank you so much for visiting.  Come back anytime.  :)  My blog is always here.

-All Papertrey Ink unless noted-
Stamps: Polka Dot Basics, Background Basics: Text Style, Fillable Frames #7, Just the Ticket
Paper: Harvest Gold, Spring Moss, Smokey Shadow
Ink: New Leaf, Smokey Shadow; VersaMark
Ribbon: New Leaf, Spring Moss, Harvest Gold
Dies: Mat Stack #4, Fillable Frames #7
Other: Clear Embossing Powder (Ranger)

Tuesday, September 21, 2010

Blast from the Past Blog Hop - September 2010

Welcome to the Taylored Expressions Blast from the Past Blog Hop!

Thanks for stopping by and taking a peek.  I have had a busy couple of weeks and it was SO needed to get some time in the craft room.  :)  Enjoy your journey through this Blog Hop!


Stamps:  Make the Grade (Taylored Expressions), Up Up and Away (Papertrey Ink)
Pattern Paper: A Walk in the Park (Echo Park) from TE Key Ingredients
Paper: White and Red (TE Key Ingredients), Hawaiian Shores (Papertrey Ink)
Ink: Noir (Pallette); Tea Dye Duo, Ocean Tides, Aqua Mist, Dark Chocolate (Papertrey Ink)
Other: Copics, Ribbon (TE Key Ingredients), Mat Stack 4 Die (Papertrey Ink)

Make sure and check out the rest of the blog hop participants!  There are going to be some amazing things to see, I am sure!

Friday, September 10, 2010

Wishing You a Happy Birthday

I have a new favorite.  :)  Yes, it continually changes.  Please no judgement about my changing.  I have grown to love Summer Sunrise by Papertrey Ink.  I really didn't care for the color, but it was nice to have around.  However, lately I find that I reach for it all the time.  I don't know if it is the changing season or what, but I love it.  So, enjoy a fun color combo that makes me smile.


-All Papertrey Ink unless noted-
Stamps: Polka Dot Basics, Through the trees
Paper: Aqua Mist, Stampers Select White
Ink: Summer Sunrise, Fresh Snow, Aqua Mist, Spring Moss
Ribbon: Summer Sunrise Grosgrain
Other: White Embossing Powder (Prisma), Scallop Border Die

Tuesday, September 07, 2010

Stamping Only

I thought the Create Blog had an interesting challenge of "stamping only".  I immediately thought of replacements for all my usual embellishments.  What a fun challenge to only use stamps and paper!  I had a blast making this card.  Sorry about the photo.  We are getting the first part of the clouds from the hurricane, and I won't be seeing sun for a couple of days.  Thanks for looking!


-All Papertrey Ink unless noted-
Stamps: Background Basics: Diamonds and Tin Types, School Time, Falling Leaves
Ink: Spring Moss, Scarlett Jewel, Smokey Shadow
Paper: Rustic White, Smokey Shadow
Other: Copic Spica, Cuttlebug Circle Die

Monday, September 06, 2010

Happy, Happy Birthday

I love having days off.  But, they can sometimes be the hardest, too.  Can you say live and breathe a schedule?  :)  I have a card to share today that was so much fun to make.  I hope you have a great holiday today.


-All Papertrey Ink unless noted-
Stamps: Life, Fillable Frames #1, Round and Round
Ink: Vintage Cream, Tea Dye Duo, Dark Chocolate
Paper: Kraft, Vintage Cream
Other: Fillable Frames #1 Die, Ric Rac (JoAnn's)

Friday, September 03, 2010

To Teach . . . .

Another Teacher card today!!

I am finishing my teacher cards, very slowly.  But, I only have 2 more to go!!!


-All Papertrey Ink unless noted-
Stamps: Teacher's Apple
Paper: Fly a Kite (October Afternoon), Red Paper and Cream Paper (Key Ingredients from Taylored Expressions)
Ink: Pure Poppy, Dark Chocolate, Tea Dye Duo
Other: Flower (Kaiser Craft), Pure Poppy Button, Dark Chocolate Baker's Twine, Text Style Impression Plate

Wednesday, September 01, 2010

Soaring by to Say Hi

Happy September 1st!!!!  That is just crazy!  We have had a great summer, but now I am ready for a long fall with fall weather.  I love the warm days and cool evenings that this time of year brings.

Today's card is featuring a couple of different things.  First, this is the very first time I have used my Everyday Button Bits set that I bought at CHA.  I love it and plan to make many, many, many, many, many more cards with it.  Also, do you see that delicious paper.  Most of my blog readers know that I don't buy anything usually except Papertrey Ink.  Well, Taylored Expressions has a great thing called Key Ingredients.  I get to use a pretty good supply of many fresh products and they just come to my door step every month.  I love it.  Now, to just use it instead of looking at it.  :)


-All Papertrey Ink unless noted-
Stamps: Everyday Button Bits
Ink: Dark Chocolate, Tea Dye Duo
Paper: Fly a Kite (October Afternoon), Yellow and Cream (Key Ingredients from Taylored Expressions)
Ribbon: Red Satin (Key Ingredients from Taylored Expressions)
Buttons: Key Ingredients from Taylored Expressions
Bakers Thread: Dark Chocolate

Thanks for stopping by!  Happy Wednesday!!

Tuesday, August 31, 2010

Too Cute to Spook

Let me just say . . . this is my 2nd ever Halloween card.  I adored my very first one (see it here).  But, we don't do Halloween.  We never have.   Every year I see all these cute Halloween projects and cards, but I am really never a part of them.  This year I decided to buy PTI's Tiny Treats: Halloween stamp set to make some things to send with the kids to school.  It is my one and only Halloween stamp set.  So, if you see it in my projects a lot, you will know why.  :)

I am playing along with Taylored Expressions Sketch Challenge #126.  I haven't talked about TE much on my blog.  I have followed Taylor's work for a couple of years and have recently become a Key Ingredients subscriber.  While I was at CHA, I had the opportunity to talk to her and let me tell you - an absolute sweet heart.  I bought my very first 4 SETS of TE rubber stamps and have become a fan in more ways.  Isn't it nice to know you are in good company?  I mean seriously; who better to play along with than a great person and a great company.  And no, I didn't get paid or compensated to say that.  :)  I pay for the privilege.

Here is my take on the challenge.  Thanks for looking.


-All PTI unless noted-
Stamps: Tiny Treats: Halloween, Polka Dot Basics II
Paper: Bitty Dots, Summer Sunrise, Harvest Gold, Stampers Select White
Ink: Summer Sunrise, True Black
Other: Copics, Copic Spica, Fiskars Circle Cutter Thing

Friday, August 27, 2010

Praying for You

Several weeks back (or a month or two *wink*) I was on a mission to use up some of my supplies or loose them.  Here is another use it or loose it card.  I know it is only the ribbon, buy hey, I have to use it up.  :)  Thanks for looking today.  Have a great weekend!!!  I hope to be back blogging on Monday.


- All Papertrey Ink unless indicated -
Stamps: Damask Designs, With Sympathy
Paper: Melon Berry, Stampers Select White
Ink: Melon Berry, Dark Chocoloate
Other: Brown Ribbon (Offray), Versa Mark Ink, Filagree White embossing powder, Mat Stack Die 4

Wednesday, August 25, 2010

Papertrey Chicks - Sketch Challenge

I am participating in the Papertrey Chicks sketch challenge.  I thought the quick and simple sketch was just what the doctor ordered for this busy time of the year.  Thanks for looking today.


- All Papertrey Ink unless noted -
Stamps: Round and Round, Beautiful Blooms II
Paper: In Bloom Pattern Paper, Stampers Select White
Ink: Enchanted Evening
Other: White Satin Ribbon (Hobby Lobby), Copic Spica

Monday, August 23, 2010

Best Wishes

I have been waiting to play with my new Guidelines Impression plate since I saw its debut.  However, I really didn't see a lot of the design team members using it.  So, I was a touch concerned about it.  It did not disappoint!  I love the simple, and much needed, texture it added to my card.  Also, did you see ocean tides?  This is one of my original favorite colors, but it has gone by the side for me lately.  Oh, how delicious that color still is in my eyes!!  Thanks for looking today!  This is our first full week of school.  Wish us luck!!


- All Papertrey Ink unless indicated -
Stamps: Guidelines, Fillable Frames #7
Paper: Rustic White
Ink: Ocean Tides, Aqua Mist
Ribbon: Ocean Tides Satin
Other: Guidelines Impression Plate, Fillable Frames #7 Die

Saturday, August 21, 2010

Teacher - You mean the world to me

Welcome to one of my very first shaped cards.  I made a shaped card about 2 years ago, which was my first.  I don't typically do these, but when the Create blog challenged us to do a star shaped card I pulled out my Gypsy and began creating.  I learned a lot!!  It wasn't nearly as painful as I thought it would be.  Maybe I will venture into them more often.  Also, I need to finish my teacher cards.  Yes, they are not done, and we started Thursday.  :)  Only 3 more!!!


Stamps: Make the Grade (Taylored Expressions)
Paper: from the Key Ingredients Kit (Taylored Expressions)
Flower: Kaiser Kraft
Other: Dark Chocolate Ink, Pure Poppy Button, Chocolate Bakers Twine (Papertrey Ink)
Die Cuts: All stars cut from George Cartridge on my Cricut

Friday, August 20, 2010

Happy Birthday

I made a card for Taylored Expressions Sketch Challenge #125.  I always admire all of Taylor's cards and never took the chance to play along.  This was a fun sketch and I had a blast making this card.

Thanks for looking!


Stamps: Beautiful Blooms II (Papertrey Ink), Wishful Elegance (Verve)
Paper: Spring Moss, Vintage Cream, Kraft (Papertrey Ink)
Ink: Spring Moss, Tea Dye Duo, Aqua Mist (Papertrey Ink)
Die Cuts: Beautiful Blooms Dies (Papertrey Ink), Circles and scallop square (George and Gypsy Wanderings cut with my Cricut)
Other: Woodgrain Impression Plate (Papertrey Ink), Rustic Twine (Papertrey Ink), Copics
Sketch: TESC #125

Saturday, August 14, 2010

Mr. and Mrs.

Today I have a wedding card to share with you.  For some reason, this is THE hardest type of card to make.  I honestly don't know where the disconnect is for me.  I don't feel like there are any great wedding stamp sets out there.  I have found a few bits and pieces here and there but nothing that knocks my socks off.  Wow, what a downer way to start a post.  Chalk it up to a late night coupled with an early morning of fussy children.  :)


- All Papertrey Ink unless indicated -
Stamps: Big & Bold Wishes
Paper: Stampers Select White, Aqua Mist
Ink: Aqua Mist, True Black
Ribbon: Black Stripe (JoAnn's)

Friday, August 13, 2010

Happy Birthday - Dino Style

I love finding ways to make cards for the younger audience.  I have 8 nephews and 4 nieces.  So, you can bet that I am always needing a birthday card for one of them.  I was totally happy to use my Tiny Treats Valentine for all sorts of applications all year long.  That set gets TONS of mileage with all the kids in my life.


Paper: Pattern Paper (Basic Grey), Vintage Cream (Papertrey Ink)
Stamps: Fillable Frames #1, Tiny Treats: Valentine (Papertrey Ink)
Ink: Orange Zest, Dark Chocolate, Tea Dye Duo (Papertrey Ink)
Other: Copics

Thursday, August 12, 2010

The Cow Jumped Over the Moon

We had a baby shower at our church for a couple that  I really didn't know well.  So, I went pretty neutral when I made this card to go with their gift.  As it turned out, I really love using yellow for baby cards.  I know I have already posted about it, but it is still true.


 And I actually stamped on the inside of a card.  !!!!  I know . . . you are thinking that is crazy.  But, I happen to see this little tip/trick on the fabulous Nicole Heady's blog.  I used Giga Guidelines as a background to the inside sentiment.  I stamped it in Lemon Tart, so it made it harder to photograph.  What do you think?  I was totally thrilled with how classy it turned out.


-All Papertrey Ink unless identified -
Paper: Lemon Tart, True Black
Stamps: Baby Boy Stamps (The Paper Studio), Background Basics: Tin Types, Giga Guidelines, Signature Greetings
Ink: True Black, Lemon Tart
Other: Lemon Tart Ribbon, Copic Markers

Wednesday, August 11, 2010

Friends for Life

I thought I would be blogging every day this week.  Well, I am glad to get any posts up.  :)  I am making some invitations - okay about 100 - for a surprise event.  I was commissioned to keep it a surprise; so once the event passes, I will share what has taken me so long.  I don't think anyone would happen by my blog, but you never know.  This is my last "job" for a while as I am taking some time off of custom orders.  Switching gears, today's card is one from earlier in the summer.  I love, love, LOVE this stamp set and would use it on every card if I could get away with it.  Thanks for stoping by!


All Papertrey Ink unless noted.
Paper: Hawaiian Shores
Impression Plate: Picnic Basket
Stamps: Life
Ink: Hawaiian Shores
Dark Blue Ink: Stampabilities
Ribbon: Unknown (seriously, it just showed up one day in one of our cars.  So, if this is yours, thanks for letting me use it.)

Saturday, August 07, 2010

Teacher Cards . . . Again

Officially, 3 teacher cards down . . . and 4 more to go.  YEAH!!!  Thanks for looking at my fast share today.  Have a great weekend!  I will back on Monday with some more cards.  :)


Stamps: School Time
Paper: Kraft, Pure Poppy, Rustic White
Ink: Simply Chartreuse, Summer Sunrise, Dark Chocolate
Ribbon: Simply Chartreuse, Harvest Gold
Other: Medium Scallop Border
-All products from Papertrey Ink-

Friday, August 06, 2010

Papertrey Ink CHA Make-n-Takes

I had a blast in Chicago for CHA.  I am forever thankful that my husband agreed to let me go without question.  It was refreshing.  Of course, the major reason I went to the show and the highlight was getting to the Papertrey Ink booth.

Nicole and crew were fantastic!!  She was right at the front of the booth greeting customers with a smile and warm welcome.  Heather and Debbie were running one make-n-take while Dawn and Michelle did the other.  PTI, by far, had the best make-n-takes of anyone else at the show.  Hey free PTI, it doesn't get better than that.  :)  The girls had to be tired from travels and long days, but you would never know from their sweet spirits and happy hearts.  They were gracious to take photos with and for fans.  During the Meet & Greet, Nicole, Heather, Debbie, Dawn, and Michelle took the time to ask questions and really connect.  It was sincere and heartfelt.  Jane was fantastic and gracious as she took the time to speak with us and answer all our silly questions.  I spent a lot of money and time to get to CHA, and they didn't disappoint.  Thanks, PTI.

First, here are the design team's cards that they made with the "Four of a Kind" free CHA set.


These were just as gorgeous as ever.  If you think their cards and projects are cute in pictures on their blogs, they are even BETTER in person, flawless.

This is the make-n-takes from Friday:


These are the make-n-takes from Saturday:


I was so appreciative that they let us impress and die cut on our own.  It was good for first time PTI'ers and those who were hesitant to try them.  Let me just say that the envelope die cut was not even on my radar, but after using it I immediately went in the booth and purchased it.  :)  Great marketing move on PTI's part.  ;)

Thanks for reading my longer than usual post.  I had a great, refreshing, relaxing time in Chicago at a much needed time.

Edited: I said Cheryl but meant Debbie. Ummm . . . can we say long week. I don't even know a Cheryl in the pepercraft world. :)

Thursday, August 05, 2010

Reach for the Sky

I made these for all the graduates this past year.  I loved how simple yet elegant they turned out.  I was able to use them for both boys and girls.  All the recipients loved them.  Thanks for looking today.  I hope you have a great rest of the week.


Stamps: Background Basics: Tin Types, Up Up and Away, Fillable Frames #4 (Papertrey Ink)
Paper: Kraft, Stampers Select White (Papertrey Ink)
Ink: Fresh Snow, Smokey Shadow, Tea Dye Duo (Papertrey Ink)
Ribbon: JoAnn's

Wednesday, August 04, 2010

Thanks be to God

It looks like I have spent lots of time in my craft room lately.  I have some cards that I have made here and there and never found an opportunity to blog them.  Here is a card made with the Taylored Expressions Key Ingredients Kit from June.


Papers: TE Key Ingredients June 2010
Stamps: Victory in Jesus (Verve), Beautiful Blooms II (PTI)
Other: Dark Chocolate and Summer Sunrise Ink (PTI), Brown Ric Rac (Hobby Lobby), Beautiful Blooms Dies, Clear Embossing Powder

Thanks for looking today!  I hope you have a blessed day!