Friday, December 28, 2007

Celebrate Friends

I am to the point where I could really use some new/fresh stamps. I have looked and looked. There are so many options, but nothing is sparking me. So, I am on a quest to find something fun and fresh. Any thoughts?

Here is another creation with the rub-ons. I used just the corners here. Much fun!


Contents: Paper - MME; Rub-ons - Cloud 9; Flowers - Prima; Transparency Saying - JoAnn's

Thanks for looking! All comments are always appreciated. :)

Thursday, December 27, 2007

Love . . . expressed in Rub-ons

I am blessed to have the most wonderful husband. He is such a romantic. It is so much fun to make love cards. Sadly, these are the cards that sell the least. But, I still have to throw one in every now and then.


Contents: Paper - MME and Paper Sudio; Stamp - Michael's $1 Stamp; Ribbon - generic; Rub-ons - Cloud 9 Design

This is the first time I have ever used rub-ons. I must say that it was a wonderful experience. I get all the hype about them. They were super easy and really added such a cute and sparkly accent to the card. I will definately be dabbling in them more.

Wednesday, December 26, 2007

Snowflake Anniversary Card

This "Happy Anniversary" card turned out so cute. I made it for my in-laws whose anniversary is on the 31st.


Contents: Plain Cardstock; Snowflake Stamp - Michael's $1 stamp; Anniversary Stamp - unknown; Glitter - Sugar by Doodlebug Designs


I have been very ill throughout December. It has been crazy. However, I do plan to restart my Cricut Monday's and adding more projects.

Enjoy! Thanks for looking!

Thursday, December 06, 2007

Baby Girl

I seem to make and sell more baby cards than any other type of card (well, wedding runs a close 2nd place). Here is another baby girl card - quick but cute!

Paper - Bazzil and Paper Studio; Flower - Bazzil; Brad - Paper Studio; Embossing - Cuttlebug; Stamp - Technique Tuesday

Tuesday, December 04, 2007

My Favorite Christmas Card

I just completed my very favorite Christmas card that I have made of all time. It is a fun card with a new twist on an old idea. I hope you enjoy it as much as I have. Merry Christmas!


Credits: Pattern Paper - Cloud 9 Design; Santa Shape - Cricut from the Doodlecharms Cart; Cardstock - Bazzil; Buttons - generic; brads - Paper Studio; Nose Colored with colored pencils

Fun and really not too difficult once you get passed the Santa!

Monday, December 03, 2007

Basic Cricut Card - George Cartridge

I have really been enjoying my new Cricut. I am hoping to have some time to really get some projects done with it. So far, I have pretty much only done basic things with it. I think it will come with time and patience (and a few more cards).

Card Details: Paper - My Minds Eye and Bazzil; "Thanks" cut with my George Cart; Ribbon - generic

Thanks for looking! I am going to try to post a "Cricut Creation" on every Monday. I'm sure I will miss a few here and there, but that is my goal. :)

Wednesday, November 28, 2007

Digi Scrapping Highlight

I have really enjoyed being on the Creative Teams for several designers. This is a really fun and creative outlet for me. I am not certain low long I will continue or if I will ever go back to designing. But, I am going to enjoy this for now. Here is a layout I made using Doreen Stolz's Smells Like Autumn digital kit.


Thanks for looking!

Tuesday, November 27, 2007

Baby Boy Card

Here is a baby boy card that I used 3 different stamps on. This is such a quick, fun yet very cute card.

Stamps used: Swirl - Autumn Leaves, Quote - Michael's, Welcome Baby - Technique Tuesday

Other: Solid Paper - Bazzil; Dotted Paper - The Paper Studio; Ink - Walnut by Stampabilities

Monday, November 26, 2007

Early Christmas Present

I was so excited that I got an early Christmas and Birthday present rolled into one. My birthday being on December 21st finally has its advantages. :) I am now the proud owner of a new CRICUT!! I couldn't be more excited. I really didn't think I would ever really need or want one. However, my mom kept insisting (yeah, she really had to twist my arm) that I watch the cricut infomercial. For the first time, I could really see the benefits of this tool for me. So, I waited until the insane sales on Black Friday and was able to get one. Yeah!

So, I am going to add to my creative line up my cricut creations. Hey that is a cool name! My very first project made 100% with the cricut is a topper or title strip thing.


The inspiration to make a pumpkin hit. I know it is a little behind the season, but I am sure there are a few of us that have not scrapped our pumpkin patch photos. :) This was so much fun to think of. I can't wait to share more in the future.

As always, thanks for looking!

Friday, September 28, 2007

Better Photos

I have been somewhat disgruntled about the images of my cards. After MUCH trial and error, I think I have found a decent solution. Here is my Thank You card that I made a little while back. The photo really didn't do the card justice. So, I reshot it. What do you think?

Here is a link to the original: Click Here

Wednesday, September 19, 2007

It's a Boy

It is official. Some of our best friends are due in late February. It's a boy. We are so excited because it is their first child. :) I made this card for her just form me. They are contemplating another cross country move and I thought she needed a little encouragement.

Credits: All papers are the Paper Studio; Stamps - Michael's $; Inks are generic black; colored with Copic Sketch markers

Thursday, September 13, 2007

Oh, How I wish I could do it all!


Yes, that is me! I am the one who tries to do it ALL. I was just looking through all the pictures of my cards. Let me tell you how disappointing it is to realize that I haven't been taking pictures of my most recent things. I made over 30 cards last month and cannot account for a single one. I knew I was letting some go without photos, but I didn't realize I let them all go. Sigh!!

Anyway, here is another wedding card I made in the black and white swirls. Again, another fun and easy card. Enjoy!

Credits: Autumn Leaves Swirl Stamps, Congrats Stamp - JoAnn's; Black Brad - Paper Studio; Ribbon - Fabric Dept

Sunday, September 09, 2007

My All Time Favorite Cake


I know I haven't posted as much of my scrapbooking as I would like to. I am going to try to keep up my posts with all my projects. :) This is a fun page showing my all time favorite cake. It has lots of stamping (my favorite) and lots of swirls (my second love). I chose to cover up the journaling with some decorated vellum to keep it from distracting from my overall design.

Credits: Paper - MME; Flowers - Prima; Brads - The Paper Studio; Both cake stamps (Michael's $1); Swirl Stamps - Autumn Leaves; Beaded element - mine

Friday, September 07, 2007

Hitting My Stride

I am back to stamping for a few days. (maybe, we'll see) I have been busy with my current design teams for the past week or so. I have had some pretty fun things to do though, so I am definately not complaining. I really like the variety in my crafting adventure. I don't really feel as if I ever get bored doing something. Mostly, if I am losing my creativity with something, then I can pick up in a little different flavor and recharge. I feel as if I am finally hitting my stride. I am past all the learning curves and trial and errors. I really believe that I know what my style is and enjoy it. No more trying this or that (hey, I am talking style, not technique). It is a good place to be and a long time coming.

Here is one of the cards I came up with this evening. I just thought it turned out so adorable. It is a Thank You card that is definately girlie!

This is an A2 card on a white base. I cut the pink paper (unknown) on the side with a scallop. I then attached the pink flower paper and the pink paisily paper (The Paper Studio). I glued the ribbon on over the seam. I stamped and watercolored the girl image (Me and My Big Ideas) and attached. The "thanks" stamp (Michael's $1) was also watercolored but attached with pop dots. I tied a bow and attached at an angle.

Thanks for looking! Until next time...

Wednesday, September 05, 2007

To Redo or Not to Redo . . .

. . . that is the question! I have really had a hard time with this. I have several scrapbook pages that make me cringe when I look at them. The scrapbooker in me says that I cannot let go of these awful pages. However, the artist in me says that they have to go. In the end, we need to do what will make us feel good about our books. For me that will be to take it page by page. I do not plan or intend to ever completely redo all past pages. However, when the inspiration hits me, I will redo a single page or double page spread here and there.


Here is a double page spread from photos a little over 2 years ago. I never really captured the memory of what we did properly. This 2 pager really gives me insight into the memory I want to carry forward.

Notes: This is my first ever digital 2 page spread (or at least that I can recall). The elements and paper are from Theresa Borntreger's Zoo Bound kit found at GDS. If you need to do some zoo pages, I highly recommend this kit. It is so fun!

Sunday, September 02, 2007

Hybrid Brag Book

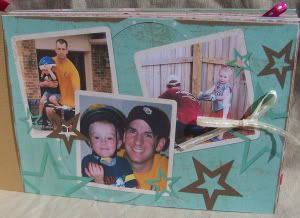
I made a fun little project this weekend for my DH's birthday. It is a small 4x6 bragbook. This was super easy to do. I made the little layouts digitally and quickly with the templates from Amy Fenner's template set. I printed, cut and glued them to cardstock. I punched a hole in the corner and secured with a binder ring. I then went back and embellished each page. Simple, quick, easy, and fun!


Here are some closeups of some of the pages:


Credits: Amy Fenner's "You're A Star Brag Book Template Set" - found at GDS; Amy Fenner's "Grunge Princess" - found at GDS;
Overview Layout was made using a Template by Amy Fenner found as a freebie on her blog

Wednesday, August 29, 2007

My First 6x6 Accordion Album

I finally broke out! I made a 100% paper project. I made, from scratch, my very own 6x6 accordion album. This was such a fun project for me. I wanted to make something special for my DH as yesterday was our 11th Anniversary of our very first date. So, I wrote a little poem and made a mini-about us album. I put a line of the poem on each page. Then I went back and found some older pictures of us. I printed in black and white with a slight sepia tone (hard to see in the photos) As for the individual page designs, I treated each "v" section like a double page spread with the exception of the font and back covers.


Credits: Pattern Papers - MME from the Bohemia collection; Stamps - Technique Tuesday, Autumn Leaves, Michael's $1 stamp, and MySentimentsExactly; Flowers - Bazzil; Ribbon - Various from sewing departments; Other items used - Cuttlebug Alphas and shapes, Scalloped Circle punch, Scalloped Square punch, inks, fiskars templates, scallop sissors, mini star punch, and black gel pen

Thanks for looking! This was one of my favorite things to put together in a long time!

Tuesday, August 28, 2007

Summer Fun

Okay, I just did a very fun digital layout. I have been bouncing so much between the two that it was nice to do something totally digi for a change. :) And, I did it start to finish! Yeah! So, without further ado, here is my layout, Summer Fun.


Credits: Digital Kit - Theresa Borntreger (godigitalscrapbooking.com); Grass Brush - mine; Font - MaryDale; Photo - I think my sister might have actually taken this photo :)

Saturday, August 25, 2007

New, Easy to Use Links

I have been working on updating my blog a bit with fresh info and easier navigation. Take note of the easy to use links just to the left. You can quickly find what you are looking for now. For instance, if you want to look at just all the cards I have posted, click on "Cards". It will go and get all the posts that I have flagged as a card post. Some of you only come for just my cards, just my digital layouts, or just my scrapbook pages. Now you can get to exactly what you came for.

YEAH!

I am going to keep moving things around and adjusting over the next week. We'll see if there is anything new in store! :)

Thursday, August 16, 2007

A "Stamp & Scrap" Happy Birthday

As many of you know my daughter's 1st birthday was this past weekend. We had a great celebration to honor her 1st year of life. I worked hard to get everything prepared to make it a spectacular event. I cooked chicken and rice in a mushroom sauce . . . I made the works. I thought I would share the photos I actually took of all the decorations. I hope you will find inspiration in all the hard work I did. I am a tad sad because I didn't get pictures of everything, but I tried.

You could pretty much call it a "ScrapArtist" birthday because most of the papers came from their In Vogue kit. I found that kit to have some of the most inspiring and gorgeous papers. I also did a lot of stamping on many of the items with the cupcake stamp. Other products used: Basic Grey Papers, MissMint Papers, Michael's $1 cupcake stamp, Michelle Coleman digital elements, ScrapArtist flower templates, and tons of decorative and patterned ribbon.


My inspiration all started with this banner. I conceived the idea to do a large banner but wanted something that I could reuse next year. LOL!

This is the serving set for cake and ice cream.

This is the front of the invite. It was made with MissMint patterned papers; I thought they went so well with the other papers. I actually printed them to cut and adhere directly to the card. No extra cutting or gluing. I added the cuttlebugged swirls kraft paper to the top. This isn't the correct card. I actually put swirls on the background of the white paper with the cupcake. Sigh. . .

This is the hat that I made especially for the birthday girl!

These stand up cards were used to mark the food at the serving line.

I made this banner to be interactive and changeable with each year. Each tile has a letter of her name on it included with the embellishments. I used photo corners to attach the photos. I will pull out the photos and use different ones next year.

This is a random deocration on the mantle. I just decorated the existing candles.


Last, is a slightly altered picture frame. I just put a touch of color and fun on this frame.