Showing posts with label Altered Projects. Show all posts

Saturday, July 21, 2012

SAF Friendship Badge

I am impressed at the paper beads.  They have an interesting look.  I am so glad I was able to participate in this challenge.  I decided to branch out and try something.  I made my own paper to make my own color scheme.

I took some regular computer paper.  I then cut it to size.  I stamped a variety of backgrounds to match the theme of the bracelet - Red, White, and Blue.  I'm not sure if it is the Olympics coming up.  Or maybe it was because we just celebrated the 4th of July.  But, I have been drawn to that color scheme for a couple of months now.  

Here are the papers that I stamped.

Here is a closeup.
I die cut them with the PTI bead dies just like you would with their bead paper.  I used the same technique just with my own paper.  This is what came from it.
I am really excited about this bracelet.  I am planning on gifting it to my sister-in-law tonight.  They love July 4th and all things American.  I hope she likes it and can use it.

I also made the traditional PTI Bead Paper bracelet.  It turned out very elegant in my opinion.  At least my 5 year old daughter thinks it is Bee-you-ti-Ful!!!  :)


This was another great challenge.  Thanks to the PTI team for such an inspiring day.  I am going out for a while with my amazing husband - just the two of us!!  I will hopefully be back later tonight to finish up some more projects.  Until then . . . 

Friday, December 31, 2010

2010 Year in Review

I was just looking through several weeks of Google Reader blogs.  I have been loving the "Top 10" posts that so many are posting.  I wanted to join the fun, but I would like to do it with a twist.  Yeah, I always like to change things up - it's how I roll.  :)

2010 has been a year of abundant blessing, much growth, many memories, a few tears (at times with much pain), and a year that I will always cherish.  Instead of picking my top 10, which is probably the last 10 cards I made, I wanted to do a year in review.  Just like life, my card making is a process.  One that is full of growth, sometimes pain, and many great memories.  So enjoy my stroll through 2010 while I choose a card that I made each month.

For January, I choose to share this card for the first time on my blog.  Yes, I do have things I don't blog about.  It happens; it happens more than I would want.

Credits:  All papers and elements from Birthday Boogie by Miss Mint at Peppermint Creative

My February favorite is really a picture I took of several cards I made.  This was for an order of many cards.  I might have shared one or two of these, but most are unseen.

I would love to include credits, but this would be crazy.  If you have something you want to know about, ask me in the comments and I will be sure to give you an answer.

March - I really need to use those butterflies more.  They are so beautiful!

Original Post Here

April - I was really starting to get into coloring with my Copics.

Original Post Here

May

Original Post Here

June - I love using so things from so many sources!

Original Post Here

July

Original Post Here

August

Original Post Here

September - I was trying to make all the teachers a card.  I still haven't finished.  *crawling into my shell*

Original Post Here

October

Original Post Here

November

Original Post Here

December

Original Post Here

Thanks for joining me in my stroll through the year.  It is so fun to see my style, growth, and change throughout the year.  I would have to say that I have finally found my "voice" in card making.  So much of what I did do was bad, a copy, or heavily inspired.  I am still inspired and influenced by many of you, Nicole Heady, and so many in the PTI community.

Goodbye 2010.  Welcome 2011 - I cannot wait to see what you bring.  (may it be a whole lot of crafting money and time *wink*)

Thursday, December 09, 2010

Verve Project Parade

I am squeaking in at the last minute for the Verve Project Parade.  When I read about the challenge, I was intrigued and knew exactly which stamps I wanted to use.  Although I love winter, I am a sunny kind of girl.  KWIM?  I wanted to make something for my husband as he has basically nothing in his office.  No seriously.  He has two pictures (one of each child) on this huge, beautiful bookcase.  So, I wanted to cheer it up a little, and I think he is going to love it.  That is the kind of husband I have - I know - so lucky!  :)

Here are my projects all together and close ups to follow.


How fun is this?  Right!  I just love all of these together.  I think it makes it more fun and more special when you know what you have created is going to bring someone you love so much "sunshine".

Here is a close up of the card.  I created the background paper by stamping and coloring the sunshine.  Then I had to add some polka dots because what is a card without them?

This is the altered canvas that I made for him.  I can see this sitting on his bookcase already.

This is just the bag.  I stamped the sun on the front but the polka dots go all around the bag.

I wanted to show you a close up of the tag and sunshine on the bag.  Do you see the sparkles?  I couldn't  make a cream colored bag look right and trust me that there are no Harvest Gold or Smokey Shadow ones to be found.  So, I made do with the kraft color.

Thanks for looking at all of my projects.  I had a blast!

Supplies:
Stamps: Let It Shine (Verve); Polka Dot Basics, Fillable Frames #10 (Papertrey Ink)
Ink: Smokey Shadow, Fresh Snow, Vintage Cream (Papertrey Ink); Harvest Gold-a-like Generic Michael's Brand
Paper: Vintage Cream, Harvest Gold, Smokey Shadow (Papertrey Ink)
Other: Harvest Gold Bitty Dot Ribbon (PTI), Vintage Cream Satin Ribbon (PTI), Copic Markers, Copic Spica Markers, Limitless Labels Die (PTI), Tag Sale #2 (PTI), Craft Paint (Aleene's), Canvas (Hobby Lobby)

Tuesday, August 03, 2010

CHA 2010 - Papertrey Ink Kites

I had an AWESOME time in Chicago attending the CHA Supershow.  By far, the highlight was getting to the Papertrey Ink booth.  I wanted to share all of the kites that hung around their booth.  I am always delighted to see new things made by the fabulous design team.  I was hoping that all the Design Team would share these on their blogs.   So without further ado . . . the Papertrey Ink Design Team Kites from CHA 2010.


I am guessing this is Lisa Johnson's.  ????  Hopefully, I will find out.


Heather posted about this kite on her blog.


I am guessing this is Nicole's.  Just a guess though.  :)


I was talking to Nicole and Dawn guessing whose kites these were.  So, I know that this one is definitely Betsy's.  And no surprise, probably my favorite.


My guess on this kite is Michelle. -- Yes, this is Michelle's.  She posted about it on her blog.


Dawn posted about her kite on her blog.


I am only guessing.  This just screams Niki to me.  -- Updated: Niki posted about her kite on her blog.


I had originally guessed this could be Dawn's.  So, I have no idea now. - This belongs to Maile Belles.  She posted about it on her blog.


My guess is that this belongs to Melissa.

Thank you for looking at some great craftiness.  I wish I could take credit for one of these, but I cannot.  :)  But, I wanted to post them anyway for your viewing pleasure.

Saturday, October 03, 2009

Digital Cutting and Puchasing Shapes to Cut

I know there is a lot of debate over which is the best cutter out there.  I am certain that there are pro's and con's about every machine.  You really need to find those and figure out which one most meets your need.  I personally purchased a cricut.  I am by no means touting that it is the best machine, but simply the best machine for me. 

Reasons I love my cricut:
  • It is compact, easy to store, easy to get out, and easy to put away.
  • I can find blades, mats, etc. at many local stores (Wal-Mart and Hobby Lobby are both within 2 miles from my house).
  • I can use it with my computer (go to http://www.craftedge.com/ to find out more) to cut any true type font I own.
  • I can design any shape I want to cut and cut it on the computer.
  • I can get wonderful cartridges that have such cute graphics on them.  (watch online - many online stores get very competitive with pricing and you can pick them up for much cheaper than the regular price).
  • I can take it anywhere that I have power and still use it.
  • I am able to cut with my computer, but not bound to it.
  • I can do cart swaps with my friends.  If I want to use a cartridge that I don't have but a friend does, we trade carts for a few days.  You cannot trade, share, or swap digital files though, only the physical cartridges.
Here is my write plate decorated for the fall using vinyl, my cricut, and SCAL.


For my plate I used a design by Tay that can be purchased at http://www.peppermintcreative.com/.  It is easy and fun to get pre-made designs.  It takes a lot of the guess work out of a project.  Tay gives good instructions with her downloadable "Vectors for Vinyl Cutting Machines" (a fancy way to say a pre-made file that you can import into SCAL and cut)  There are tons of shapes, decorations, die cut images, and such to fill your day with cutting.  You can use them for all types of things: cards, scrapbook pages, home decor, paper crafts, just to name a few.
Credits:  Graphics - Tay's Pumpkin Patch Commercial Vectors for Vinyl Cutting Machines available at Peppermint Creative; Vinyl - Expressions Vinyl

Saturday, September 26, 2009

Speaking of Trees

I have said before how much I adore cute trees. I was so excited when I saw the digital papers and elements from Peppermint Creative called Family Tree. I immediately fell in love with the tree and the rest is history. I made this adorable frame origionally for our living room. But now I am considering giving it away. Enjoy!


Tips and Tricks: I used Grafix Rub-on Transfers to make the rub-on that I used on the glass of the frame. I glued the bows, flowers, and rinestones on top of the glass (I can change them with the seasons if I want).
Credits: Pattern Papers, Tree, and Word Art - Miss Mint from Peppermint Creative; Mini Flower Punch - EK Success; Rinestones and Kraft Paper - Papertrey Ink; Bows - Hobby Lobby; Rub-on Paper - Grafix

Monday, September 14, 2009

Look at this Cutie

I adore this wooden tree.  I picked this up at JoAnn's on clearance for $1.  I painted it, and it sits on my mantle at various seasons and times in the year.  Here is the tree adorned with adorable hearts.


Credits:  Patterned Paper is My Minds Eye, Hearts were cut with my Cricut using the George and Doodlecharms Cart's

Friday, September 04, 2009

Painting for my Daughter

I am always looking for something new and exciting to do. I love challenges and new things. After painting my daughters room, I really wanted something kid-ish yet mature to put in her room. I don't do kiddie stuff. :) No cartoon themes. I like sophistication with flair. After looking and shopping for endless hours, I had a thought. I could paint her a picture. So, I went to Hobby Lobby and purchased a large canvas. This is what I came up with.


I was decently pleased with what developed. So, this is hanging over her bed in her room now. The Bible verse was actually printed on "make your own rub-on paper". So, it is technically a rub-on. You really cannot tell without really looking, but the flash picks it right up.

Tuesday, September 01, 2009

Fun Little Box

As many of you know, I LOVE to give gifts. I love gift sets! I needed something to put some cards into for a card set gift. I racked my brain over and over. This is what I came up with. These boxes are perfect to store cards, envelopes, stamps, etc. Inside each box, I put a set of cards that cordinate with the colors of the box. One box was a mix of cards - birthday, thank you, and so on. The other box was full of notecards that could be used for any occassion. The girls just loved them. I just loved making them and seeing happy faces. :) To make the boxes, I found a paper meche type of box that I painted dots on them. I glued ribbon around them to look like a wrapped present. I made the huge bows that went on top and glued them on. I then cut tags from the Fiskars paper cutting tool (it is the orange templates that you use the sliding cutter). I stamped and inked the tags. Violla! Cute gift box!

FYI - I made these a while back. I ran across the picture and thought it would be great to share. ;)

Sunday, July 19, 2009

Laundry Room

We moved into our house about 3 years ago. I have been moving at a snails pace getting it decorated, painted, etc. I have always wanted to do "something" with the Laundry Room. I love having a dedicated space - as opposed to our walk through laundry room at our old house. So, I made this to spruce up the walls. I haven't painted or anything else, but this helps a little.

I used a frame that I had at the old house and haven't been able to repurpose here. I used digital papers as the mat - I printed them and then used them. The letters are also digital papers that I printed and then cut with my cricut - I used a font on my computer with SCAL. I added a few embellishments to the letters and then adhered them to the page. I drew some clothes in a graphics program and filled them with digital papers as well. I printed them on card stock and then hand cut them. I attached them to the ribbon with staples. Many people say I should have used tiny clothes pins, but I didn't want them to fall off. I also thought the clothes pins would clutter it up so to speak.


Credits: Papers - Laura Burger (Boone Hall), Clothes - drawn by me, Ribbon - from stock, Flowers - from a Scrapbook kit purchased at Sam's Club

Sunday, September 02, 2007

Hybrid Brag Book

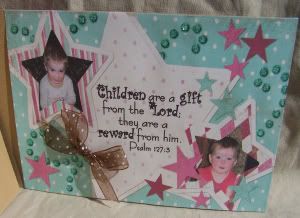
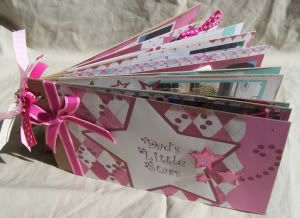
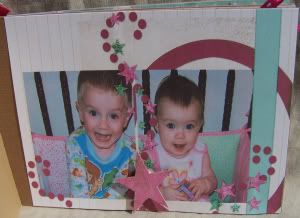
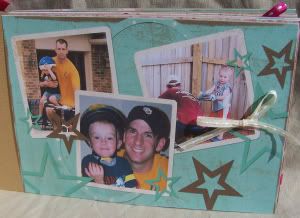
I made a fun little project this weekend for my DH's birthday. It is a small 4x6 bragbook. This was super easy to do. I made the little layouts digitally and quickly with the templates from Amy Fenner's template set. I printed, cut and glued them to cardstock. I punched a hole in the corner and secured with a binder ring. I then went back and embellished each page. Simple, quick, easy, and fun!


Here are some closeups of some of the pages:


Credits: Amy Fenner's "You're A Star Brag Book Template Set" - found at GDS; Amy Fenner's "Grunge Princess" - found at GDS;
Overview Layout was made using a Template by Amy Fenner found as a freebie on her blog

Wednesday, August 29, 2007

My First 6x6 Accordion Album

I finally broke out! I made a 100% paper project. I made, from scratch, my very own 6x6 accordion album. This was such a fun project for me. I wanted to make something special for my DH as yesterday was our 11th Anniversary of our very first date. So, I wrote a little poem and made a mini-about us album. I put a line of the poem on each page. Then I went back and found some older pictures of us. I printed in black and white with a slight sepia tone (hard to see in the photos) As for the individual page designs, I treated each "v" section like a double page spread with the exception of the font and back covers.


Credits: Pattern Papers - MME from the Bohemia collection; Stamps - Technique Tuesday, Autumn Leaves, Michael's $1 stamp, and MySentimentsExactly; Flowers - Bazzil; Ribbon - Various from sewing departments; Other items used - Cuttlebug Alphas and shapes, Scalloped Circle punch, Scalloped Square punch, inks, fiskars templates, scallop sissors, mini star punch, and black gel pen

Thanks for looking! This was one of my favorite things to put together in a long time!

Thursday, August 16, 2007

A "Stamp & Scrap" Happy Birthday

As many of you know my daughter's 1st birthday was this past weekend. We had a great celebration to honor her 1st year of life. I worked hard to get everything prepared to make it a spectacular event. I cooked chicken and rice in a mushroom sauce . . . I made the works. I thought I would share the photos I actually took of all the decorations. I hope you will find inspiration in all the hard work I did. I am a tad sad because I didn't get pictures of everything, but I tried.

You could pretty much call it a "ScrapArtist" birthday because most of the papers came from their In Vogue kit. I found that kit to have some of the most inspiring and gorgeous papers. I also did a lot of stamping on many of the items with the cupcake stamp. Other products used: Basic Grey Papers, MissMint Papers, Michael's $1 cupcake stamp, Michelle Coleman digital elements, ScrapArtist flower templates, and tons of decorative and patterned ribbon.


My inspiration all started with this banner. I conceived the idea to do a large banner but wanted something that I could reuse next year. LOL!

This is the serving set for cake and ice cream.

This is the front of the invite. It was made with MissMint patterned papers; I thought they went so well with the other papers. I actually printed them to cut and adhere directly to the card. No extra cutting or gluing. I added the cuttlebugged swirls kraft paper to the top. This isn't the correct card. I actually put swirls on the background of the white paper with the cupcake. Sigh. . .

This is the hat that I made especially for the birthday girl!

These stand up cards were used to mark the food at the serving line.
I made this banner to be interactive and changeable with each year. Each tile has a letter of her name on it included with the embellishments. I used photo corners to attach the photos. I will pull out the photos and use different ones next year.

This is a random deocration on the mantle. I just decorated the existing candles.


Last, is a slightly altered picture frame. I just put a touch of color and fun on this frame.